


Virtualizing Haiku in Hyper-V
For Google Code-In 2017, Arnav Bhatt created a video on how to install Haiku in Hyper-V [11 MiB].
There are two methods for installing Haiku: RAW images and Anyboot images. RAW images consist of a pre-installed environment, whereby the Virtual Hard Disk is of a fixed size. By using a RAW image, you do not need to go through the installation process. The Anyboot images, on the other hand, can be burnt to a CD-RW or DVD-RW, or even a USB drive but they can also be used in Hyper-V, to create a virtual CD-ROM that can be used to install Haiku onto a virtual Hard Disk or even to just boot into Haiku directly. Whilst Anyboot images can be used to boot directly into Haiku, any changes that you make to the Anyboot drives will be reverted as soon as you shutdown/restart. That is why you will need to install the Haiku image to a (virtual) hard drive using the installer program bundled with the Anyboot image. This guide will show you how to get Haiku running in Microsoft’s Hyper-V using the Anyboot images.
Step One: Enable Hyper-V and download a Haiku image
Part A: Enabling Hyper-V
Since Hyper-V can be found bundled with any edition of Windows Pro of version 8 or later (this also applies to the Windows Server equivalents), it does not need any extra downloads. To enable Hyper-V, press + to open the “Run” window. Then type “OptionalFeatures” and press . The “Windows Features” window should now be visible. Tick the “Hyper-V” checkbox and click “Ok” to install Hyper-V. This may require you to restart your computer.
Part B: Downloading a Haiku image
The required image files can be found on the “Get Haiku” page of the Haiku website, which is located here. It is recommended that you use the nightly images for now, as the Alpha 4 images were released over 5 years ago at the time of writing (December 2017), which means that they does not contain any of the new features and fixes that Haiku has gained since then. The architecture that we will be using is x86_gcc2, as virtualising the x64 architecture is not covered by this guide. You can find the x86_gcc2 images here.
Step Two: Configuration Wizard
Run the Hyper-V Manager, which can be done by going to Action > New > Virtual Machine. The configuration wizard that will help you set-up Haiku in Hyper-V. To begin, click “Next”.
This next window is the “Specify Name and Location” window. Here you will need to add the name of your virtual machine (try “HaikuVM”) and specify where your virtual machine will be stored.
If you are running this using Windows 10 or Windows Server 2016, then please follow the step below.
Windows 10 configuration:
If you are running Windows 10 or Windows Server 2016, there is an additional step that you must perform (shown in picture 2-1-1). When you click the “Next” button, you are prompted to select the machine’s generation. Always select “Generation 1” for Haiku.
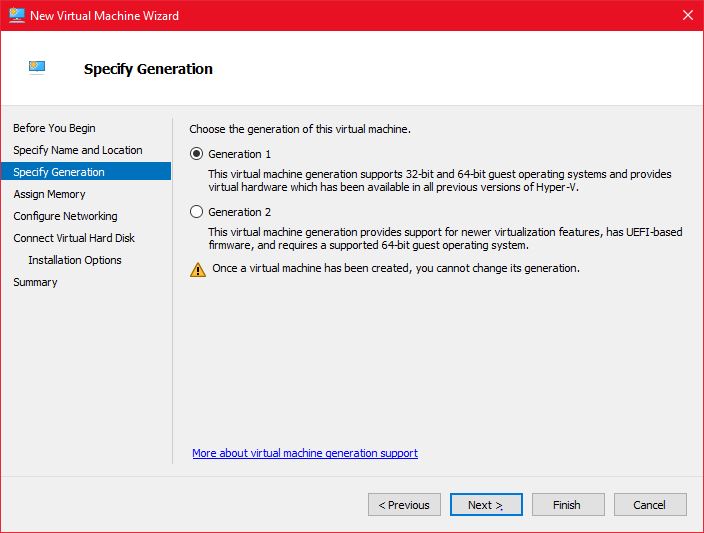
Picture 2-1-1
Click “Next” to go to the Assign Memory window. You need to tell Hyper-V how much memory it can use with this virtual machine, as otherwise the Virtual Machine might consume all the memory of your actual machine. A general rule is to use half of your total RAM e.g. if you have 8GB of RAM, give the Virtual Machine 4GB. You can also check the “Use Dynamic Memory” checkbox, which will allow Hyper-V to use more memory when it needs to (see picture 2-1).
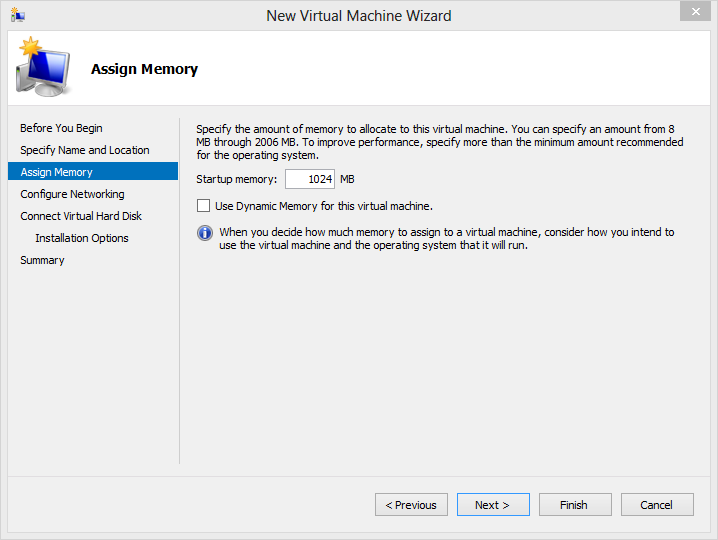
Picture 2-1
Click “Next” again to go to the “Configure Networking” screen, however as Haiku does not yet work with Hyper-V’s default network adapter, just leave it as it is and click “Next”, we will come back to it later.
On the following screen you are asked to create a virtual hard disk or attach to an existing virtual hard disk. We will create a virtual hard disk, so give it the name “Haiku.vhdx”. The virtual hard disk size can run with 1GB hard drive but it will need something over 5GB in order do the things you want. You are also asked give location of where the virtual hard disk will be kept; give it lots of room (see picture 2-2)! When you are finished click “Next” again to go the following screen, here you are asked to specify where your installation media is.
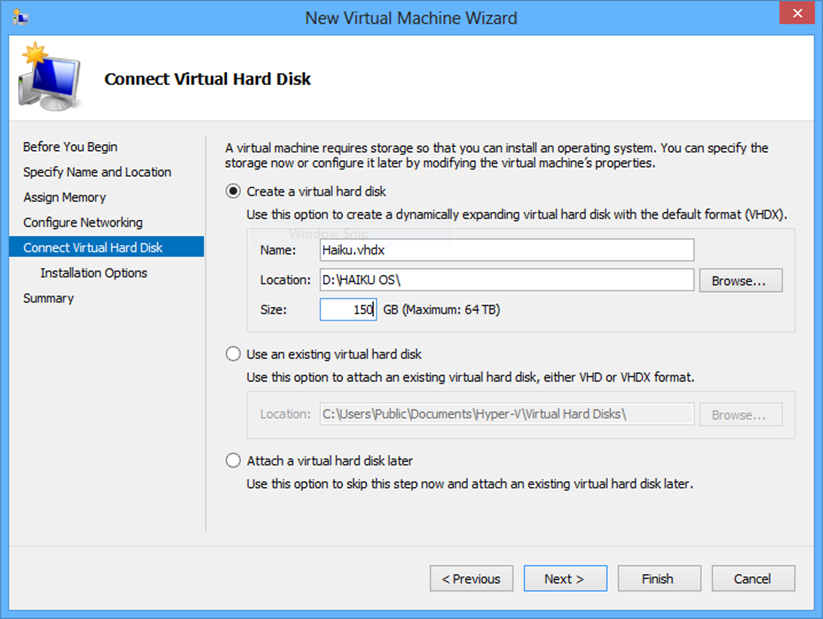
Picture 2-2
Choose “Install an operating system from a boot CD/ROM” and then select Image file. Now click browse and select the Haiku image that you downloaded previously (see picture 2-3). We are now finished with the wizard so click “Finish”.
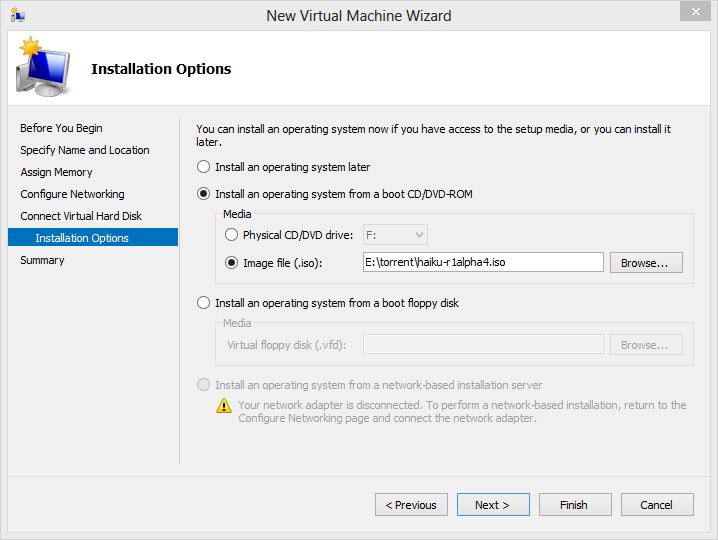
Picture 2-3
Step Three: Installing Haiku
Now that we have created the virtual machine, we need to start the virtual machine and install Haiku. On the main screen, double click the virtual machine we just created, which should be located in the column Virtual Machines. Now on the window that pops up click Action > Start. This will start the virtual machine and the installation will begin. You should see a screen like picture 3-1.
To free your mouse from virtual machine, press the key combination + + .
During the installation, there are three steps that you need to complete:
Step One: Choosing your language
As you can see in picture 3-1, the first screen that you should encounter when booting the ISO is the language-select screen. You should select your language from the list to the left, we will assume English to be your default for this guide. After that, select your keyboard mapping from the “Keymap” dropdown. This is important because your keyboard may be typing the wrong keys if Haiku does not know what format it uses.
After selecting your display language and keyboard layout, click the “Run Installer” button to continue.
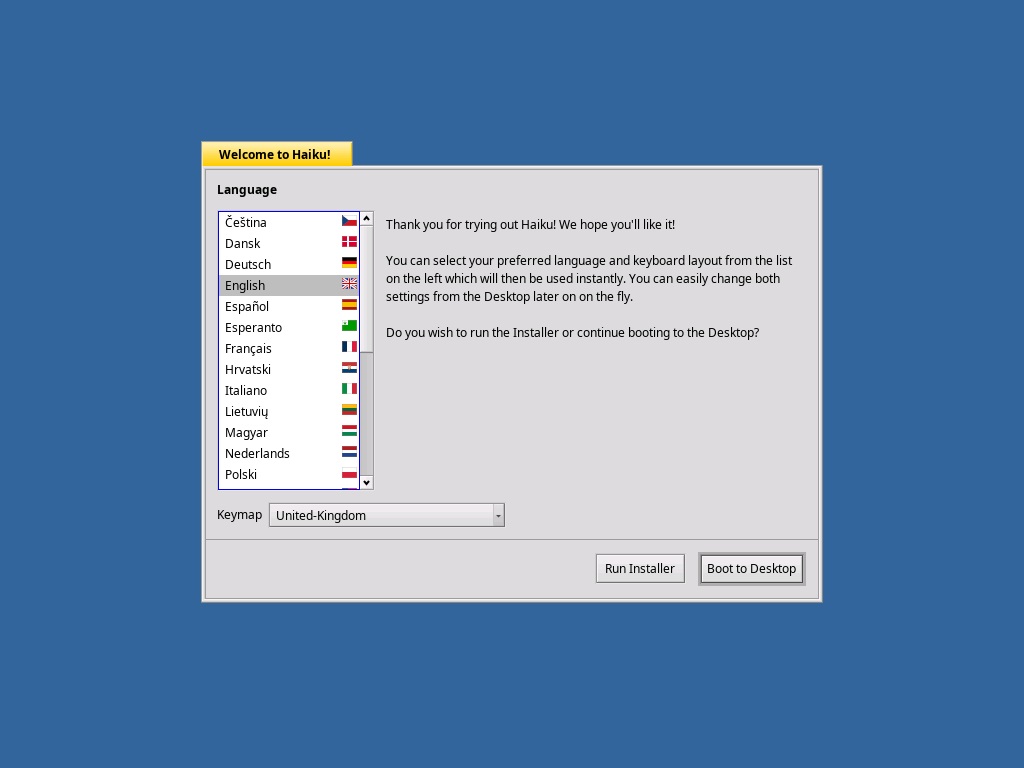
Picture 3-1
Step Two: Set-up your partitions
After clicking the “Run Installer” button, you should see a screen like the one shown in picture 3-2. This is just a message warning you that Haiku is alpha-quality software, which may crash and break at times. After reading the text on the new screen (or not reading it), click the “Continue” button to carry on with the installation.
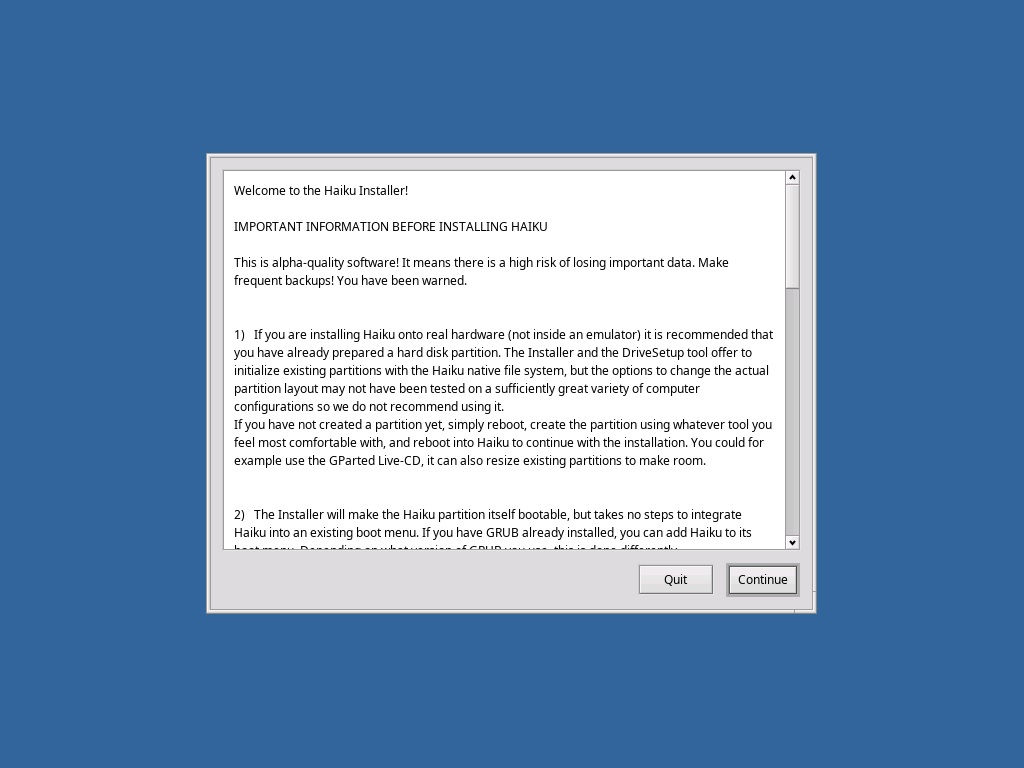
Picture 3-2
When you first run the installer, you will see a message claiming that no suitable partitions have been found. Just dismiss the pop-up by clicking the “Ok” button. You should now see an image that looks similar to picture 3-3. Select the “Set up partitions…” button to open “DriveSetup”, which should look like picture 3-4.
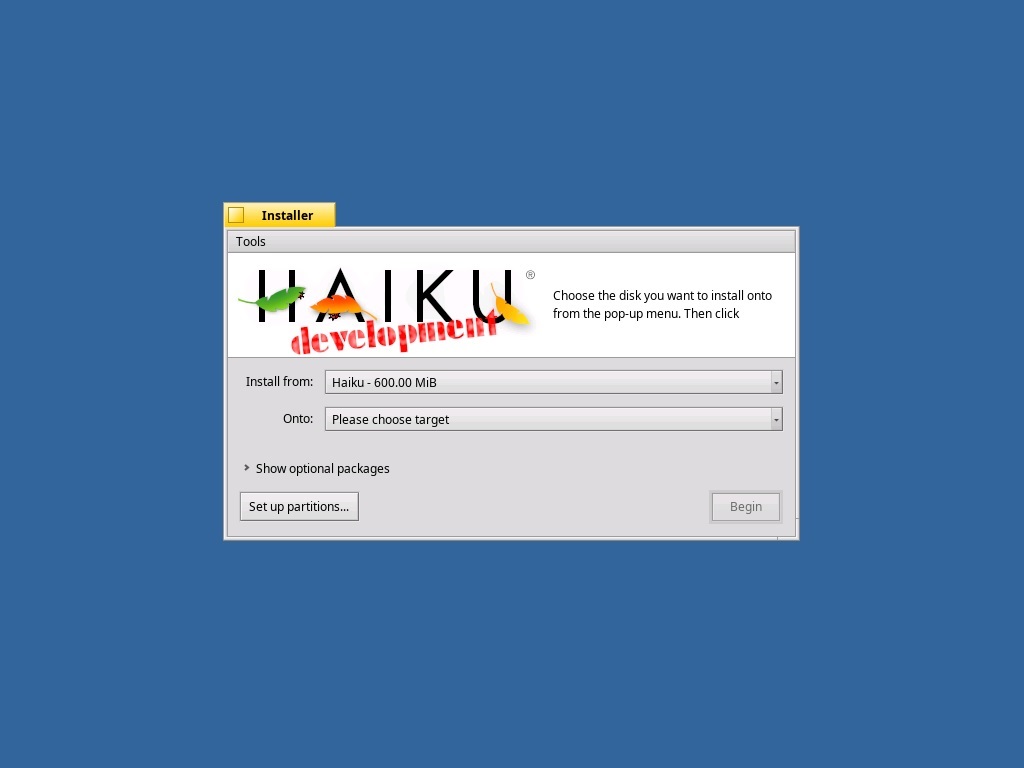
Picture 3-3
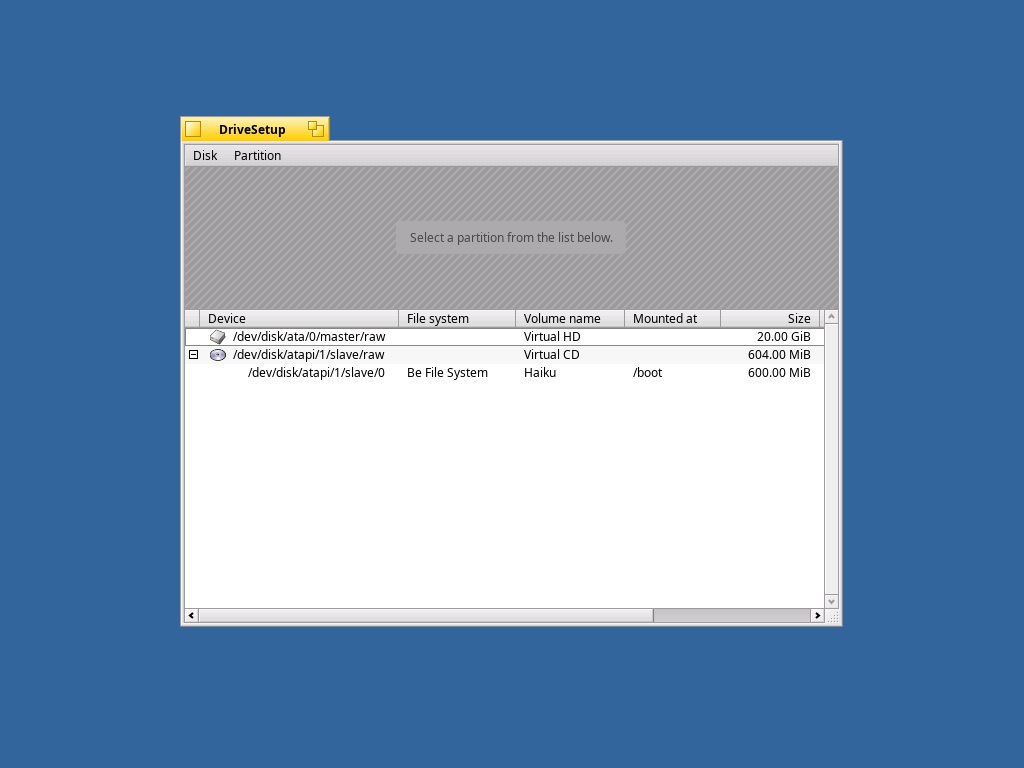
Picture 3-4
Click on the volume that has the name “Virtual HD”. This will be our OS volume but first we need to format it. To format the volume, click on the “Disk” menu in the top-left corner of the window, hover over the “Initialize” section and select the “Intel Partition Map…” option. A warning message will appear, telling you that you will lose all the data on that disk, which is ok since there is no data on the disk currently. Click the “Continue” button to proceed with the partitioning. Another warning will appear as well, just click the “Write changes” button to dismiss it. The disk should now be ready for formatting. Just click the “Ok” button to dismiss the success pop-up and we can start to create partitions.
At this stage, the “DriveSetup” window should now look like Picture 3-4.
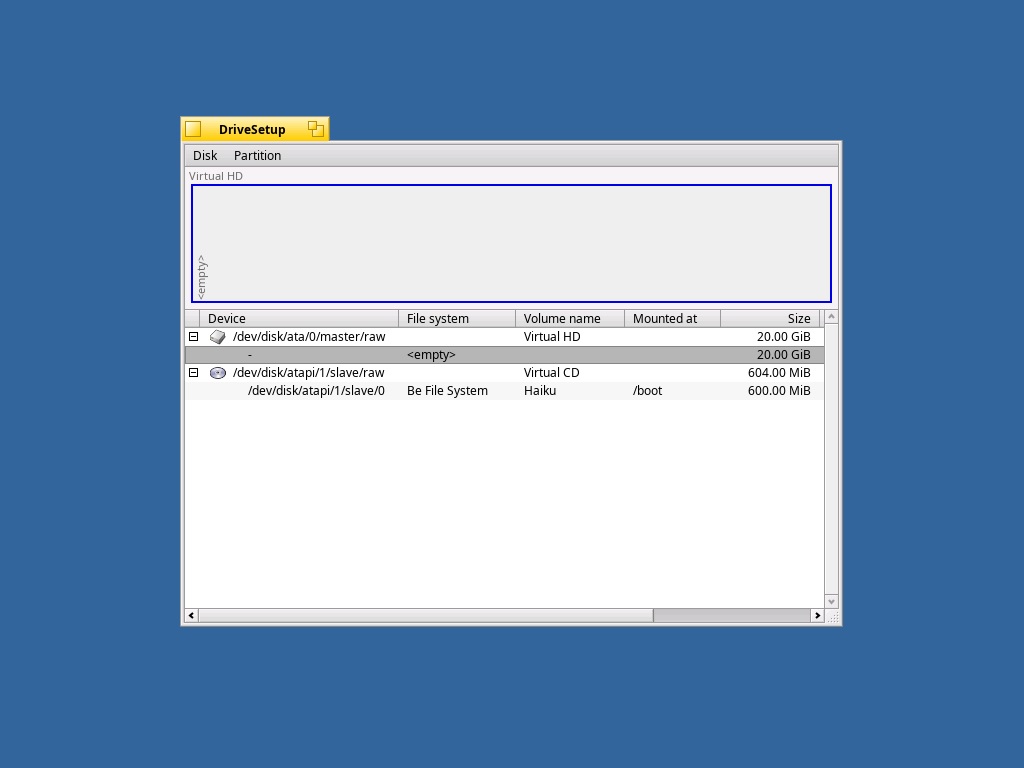
Picture 3-4
Select the partition named “<empty>” and right-click on it. Then, click the “Create” button. This will create a partition in that space. Set it to fill the entire drive and tick the “Active partition” checkbox. You should now be seeing a window that looks similar to picture 3-5. Then, just click the “Create” button and press the “Write changes” button again.
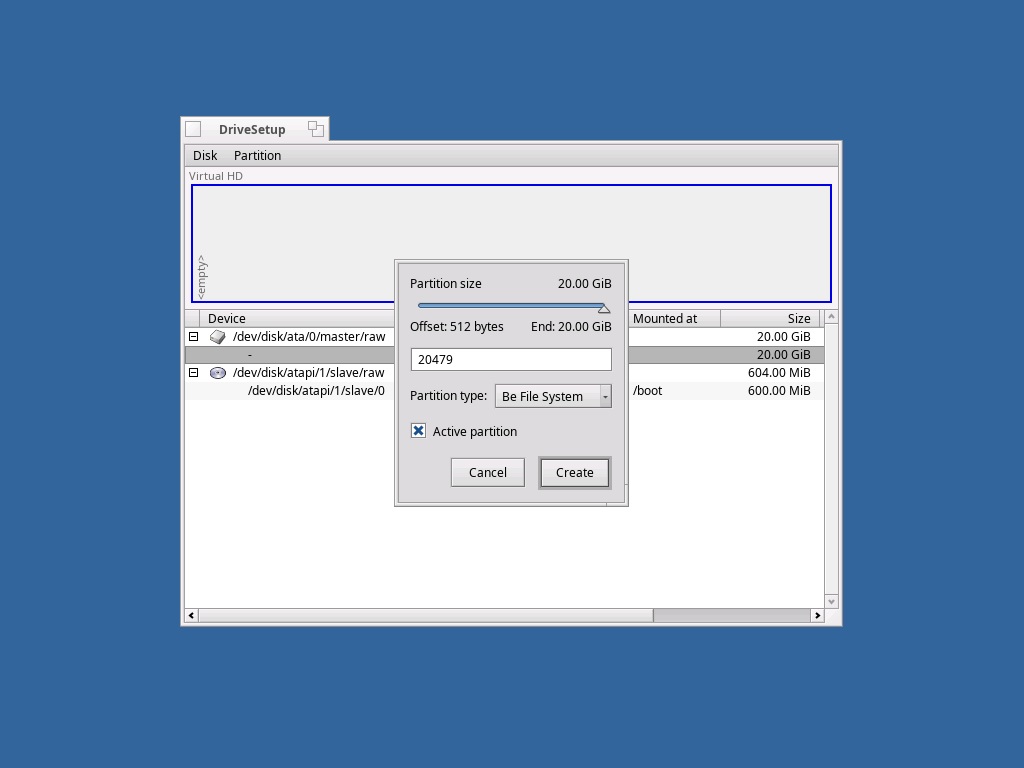
Picture 3-5
There is one final step before the file system is ready: formatting our partition. To do this, right-click on the partition that we just created, now called “(Be File System)”. Then, hover over the “Format” option and click the “Be File System…” item. Once again, click “Continue”. You should now see a box asking for a name to give the partition (seen in picture 3-6). Call it “Haiku” (the default) and click “Initialize” and “Write changes”. Once this is done, click “Ok” and you now have a working file system.
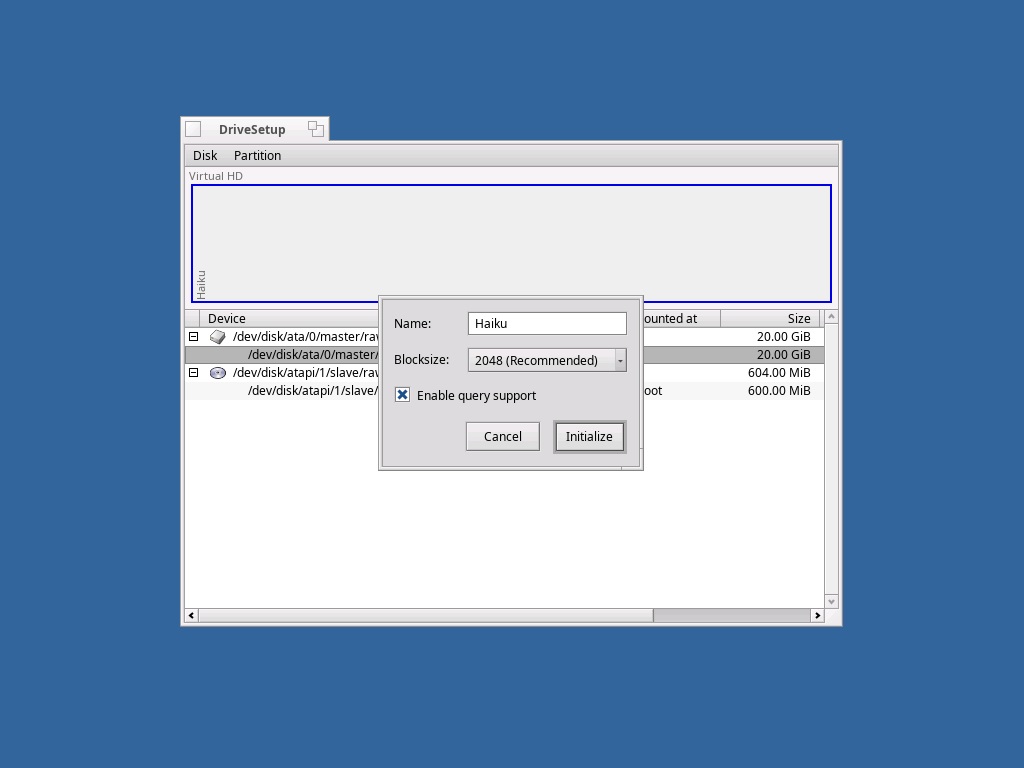
Picture 3-6
Step Three: Install Haiku
Close the “DriveSetup” program by clicking on the box in its top-left corner to return to the main setup menu (as seen in picture 3-3). This time, click the “Onto” drop-down and select the partition we just made (the one called “Haiku” that is not greyed out). Once that is done, just click “Begin”. The setup will then install Haiku onto the partition you just made.
Once the setup is completed, just click “Restart” and you will be in your very own Haiku installation.
Additional Steps
Step One: Networking
Firstly, we need to create a network connection, so that we can have network access from our Haiku Virtual Machine:
-
Go to Action > Virtual Switch Manager, choose external and click Create Virtual Switch.
-
Open up Control Panel > Network and Internet > Network Connections. You will find that you now have “Ethernet” and “vEthernet (Your Switch Name)” connections.
-
Right click on “Ethernet” and click “Properties”. Under the Networking Tab select all items in the “This connection uses the following items” and then click “OK” (see picture 4-1).
Windows will give you a warning about items being disabled (such as IPv4, etc.). Click “Yes” to the dialog that appears (see picture 4-2). At this point you will see the “vEthernet” connection switch to the “Identifying…” state, so just wait a few moments until you are connected to your local network again.

Picture 4-1
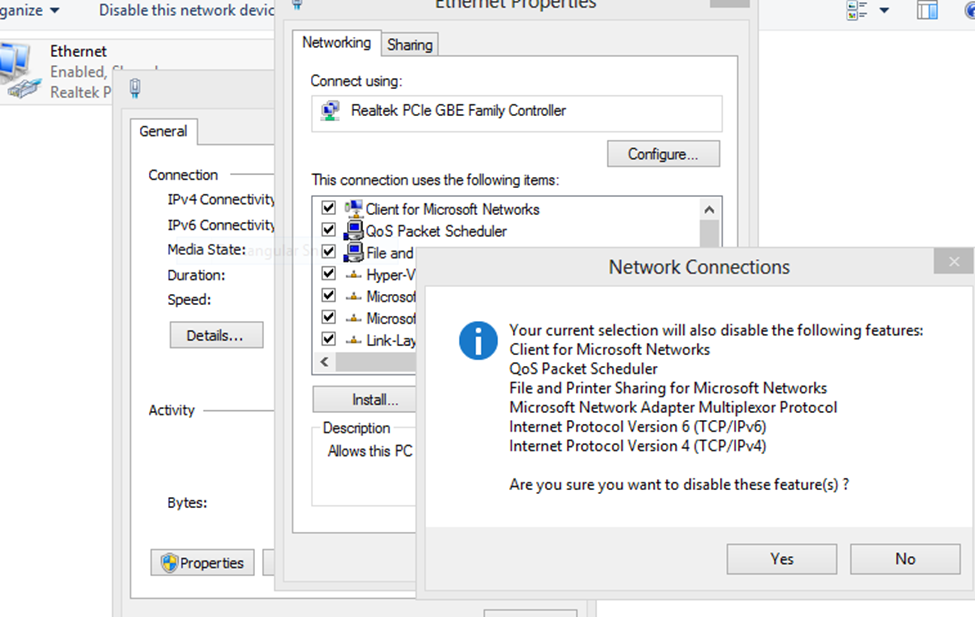
Picture 4-2
Now, open the settings window of your Haiku Virtual Machine by right-clicking on its name and selecting the “Settings…” option. Then, click on the “Network Adapter” icon and click the “Remove” button (see picture 4-3). Press “Apply” to save your changes.
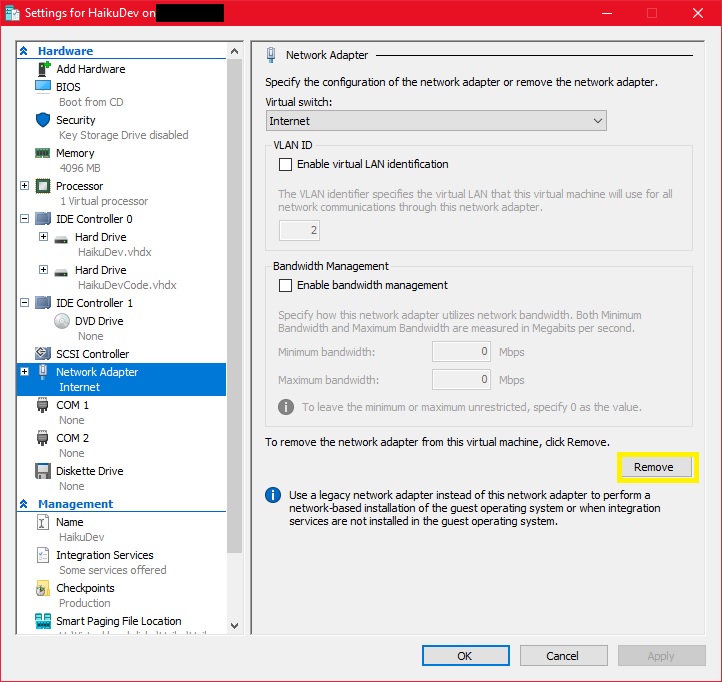
Picture 4-3
Haiku does not currently work with the default type of network adapter on Hyper-V, so the adapter must be changed. Click on the “Add Hardware” section, add a “Legacy Network Adapter” and click “Apply” (see picture 4-4).

Picture 4-4
Go to the settings of the virtual machine in Hardware > Legacy Network Adapter > Virtual Switch, choose your connection and click “Apply” (see picture 4-5).
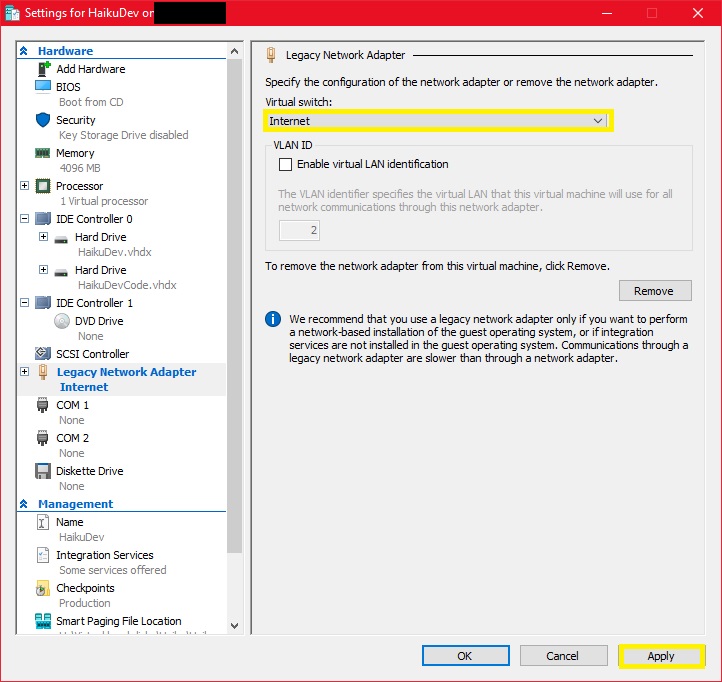
Picture 4-5