The Attack Of The Warriors, Part 1
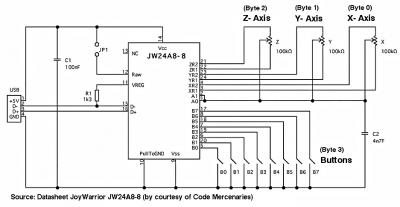 Figure 1: JoyWarrior24 A8-8 USB Joystick Controller Schematic
JoyWarrior24 A8-8 can manage three analog potentiometer axes with 8-bit resolution each. Furthermore up to eight buttons can be connected directly to the chip. But how can the joystick be controlled by BeOS? Where is the hardware driver? Don't panic--no dedicated driver is necessary for our purpose--you only need Be's USB bus manager, the raw driver, and the USB kit. However, if you really want to play "Flight" (located inside the Demos folder), then use USB Joystick Driver. So, don't hesitate, get the hardware, do some soldering and make the connection to your PC running BeOS (Code Mercenaries supports Windows, MacOS and Linux). Wait a moment - it's better to use a cost-effective 4-port USB-Hub to connect to the computer. You then will be well-prepared for the following newsletters where more USB-circuits will be introduced. The hub serves two purposes: Four USB devices can be connected simultaneously and the hub will disconnect from the PC in case of a short circuit. All connections done? Well, first launch USBCommander v0.2 - I debugged version 0.1 to enhance stability.
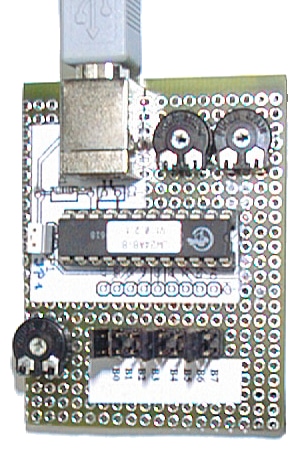 Figure 2: JoyWarrior24 A8-8 USB Joystick Controller
You see the Standard USB Hub at /0/1 and two CodeMercenaries devices. The JoyWarrior A8-8 at /0/1/2 is connected to port number 2 of the hub (ports are counted from 0 to 3, the physical port in this case is 3). Let's have a look at the USB Device Info window. We find a single configuration using a single interface and an endpoint receiving data via Interrupt-Transfer. The data size is 4 bytes and every 10 ms data can be accepted. Getting this data is done using only a few lines of code.
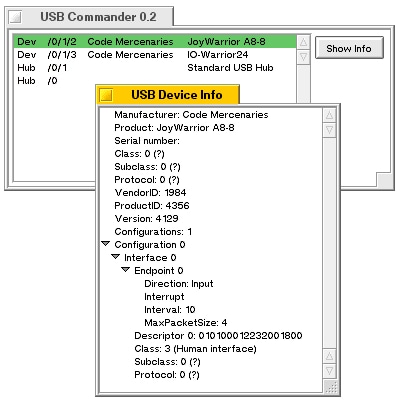 Figure 3: USB Device Info
The essential lines of code of the command-line version of JoyWarrior are the followings:
- USBDevice dev(argv[1]): the USBDevice class is initialized from a path to the raw USB device at /dev/bus/usb/0/1/2.
- dev.SetConfiguration(dev.ConfigurationAt(0)): configure device using configuration 0.
- const USBEndpoint *ept = dev.ActiveConfiguration()-> . . .: get access to the endpoint where all transfers are performed.
- ept->InterruptTransfer(data,4): get 4 bytes of data via Interrupt-Transfer.
Now quit the USBCommander application and start JoyWarrior. Use the Tracker add-on "Summon" to launch a terminal related to the current directory where JoyWarrior is located, type JoyWarrior, add the path, and press Return. Then you can add or remove the jumpers or manipulate the potentiometers and observe how data is changing. You can cancel all action by typing Ctrl + C or closing the terminal.
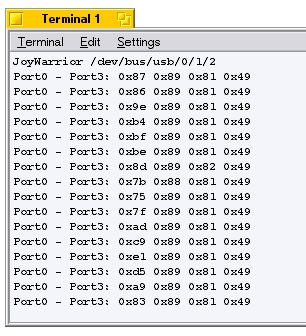 Figure 4: JoyWarrior
If you like it more comfortable then try StickIt, written by Be Inc. to demonstrate the new BJoystick class. The JoyWarrior device is recognized as a "Generic USB Joystick". Of course you must have installed the above mentioned driver.
 Figure 5: StickIt
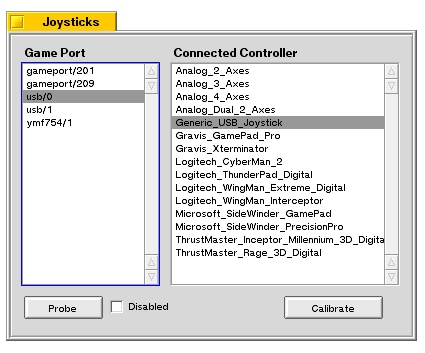 Figure 6: Joystick Preflet
If you don't like the driver then launch the GUI version of "JoyWarrior" . Don't forget to insert the proper vendor ID, product ID, and serial number. USBCommander will deliver you this information. Finally, press "Search USB Device", and if the dedicated device is present the product string will be displayed. The "Start/Stop Receiving" button is now enabled to start the communication between the joystick and your PC.
Last but not least, you can hot-plug the device. When the JoyWarrior is removed from the bus, the communication is cancelled, and after reconnecting, the device will be recognized again.
A joystick isn't an overwhelming piece of hardware and is shown here only for demonstrating purpose. The next article will deal with IO-Warrior24 and IO-Warrior40, two generic universal I/O controllers for USB... and for BeOS.
 Figure 7: Hot-plugged
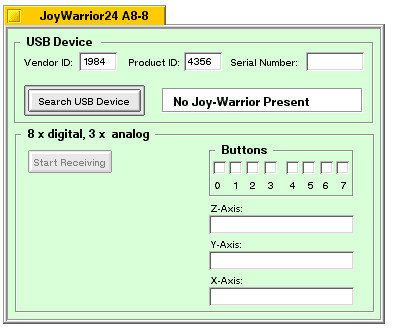 Figure 8: Not-plugged


