| Index |
| File Edit Browse Image View Attributes Keyboard shortcuts |
 Просмотр изображений (ShowImage)
| Расположение в Deskbar: | Отсутствует в меню Deskbar, обычно запускается по двойному щелчку мыши по файлу. | |
| Расположение в Tracker: | /boot/system/apps/ShowImage | |
| Настройки хранятся по адресу: | ~/config/settings/ShowImage_settings |
ShowImage allows you to view images in all formats that are supported through DataTranslators. New formats are automatically recognized when their translator is added to the system. This has been done for Haiku's vector icon files, WonderBrush images or when WebP images became available, for example.
ShowImage doesn't provide editing features, but it does allow you to select a rectangular area and save it in any format. You can also rotate and flip images, but these operations don't physically change images. They only add an attribute that indicate to rotate or flip the image automatically when it's opened the next time.
Let's go through the menus in order, leaving out the obvious items.
 File
File

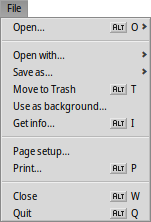
The sub-menu lists the most recently viewed images.
The lets you open the current image in any application supporting its filetype.
The sub-menu lets you choose a format to save the current image.
opens the Backgrounds preferences to quickly set the current image as backdrop of your workspace(s).
 Edit
Edit

When is activated ̵ also available with the dashed rectangle icon of the tool bar ̵ you can select a rectangular area of the image that you can then drag&drop to the Desktop or any folder to save it. Dragging with the right mouse button will show a menu when dropping the snippet that lets you choose another image format.
If you don't want to change modes first, you can create this selection frame in "normal mode" by simply holding CTRL while left-click-dragging.
or ESC will remove the selection frame.
 Browse

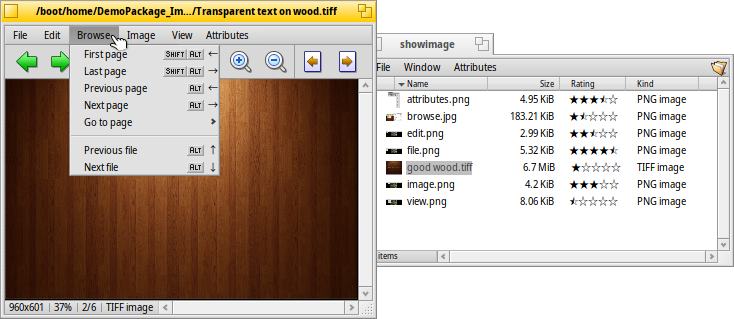
После того, как вы открыли изображение вы можете просмотреть все изображения находящиеся в этой же папке (или в окне результата поиска) при помощи клавиш ↑/↓ и ←/→. Вы можете видеть процесс перемещения от изображения к изображению в окне Tracker.
There is a quick way to open the folder of the current image and even navigate to its parent and subfolders. It works just like with drill-down navigating in Tracker by clicking in the info area in the status bar that shows size, zoom level and format of the current image.
Рассмотрим меню , которое содержит ряд команд для просмотра специфичных форматов. Некоторые форматы изображений, например TIFF, могут содержать несколько страниц в одном файле. Такие команды как и позволяют переключаться между этими страницами.
 Image
Image

The menu offers the few image manipulations necessary for an image viewer: rotating and flipping the image.
Note however, that the actual image data won't be changed. Only an attribute is added to the file so it'll be shown rotated or flipped the next time you open it.
 View
View

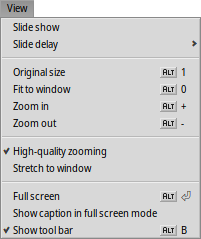
В меню первые два пункта позволяют запустить всех изображений в папке (или в окне результата поиска) и установить в диапазоне от 2 до 20 секунд.
Следующие команды применяются к отображаемому изображению (без изменения размеров окна):
- отобразить изображение оригинального размера.
- подогнать изображение под размеры окна.
и - увеличить или уменьшить изображение с шагом 10% от оригинального размера. Увеличить и уменьшать также можно при помощи колёсика мыши; если изображение не умещается в окно, то для его прокрутки нажмите левую кнопку мыши и тащите.
Two settings don't just apply to the currently displayed image and are remembered when browsing from one image to the next:
applies a very fast filter when zooming to reduce jagged lines and produce a smoother result.
will stretch smaller images to fill the current window frame.
Следующий пункт меню с опцией - отобразить название файла изображения в нижней части.
Последний пункт, - включить/отключить отображение панели управления:

From left to right: Previous image, next image, start slide show (in full screen mode), selection mode, original size, fit to window, zoom in, zoom out, previous and next page (when an image format like TIFF allows multiple pages in one file).
Большинство наиболее часто используемых команд доступны в контекстном меню, которое вызывается правым щелчком мыши в любой области изображения. Очень удобно при использовании полноэкранного режима.
 Attributes

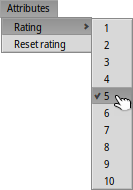
Here you can set a of the current image between 1 and 10, or choose to set it back to "unrated" (= "0").
In Tracker, ratings are displayed in a "Rating" attribute column as a number of stars. Five stars represent the 10 possible values, resulting in half-star steps. For example, a rating of 7 is shown as 7 / 2 = 3.5 stars: ★★★⯪☆.
You can edit the rating directly in Tracker as well: Select the file, choose from the menu and press TAB to get into the "Rating" column. Now you can enter the new numerical value which will turn into a star rating after hitting ENTER.
 Keyboard shortcuts
Ниже представлен список наиболее полезных сочетаний клавиш:
| ← / ↑ | Предыдущее изображение | |
| → / ↓ | Следующее изображение | |
| DEL | Удалить в корзину | |
| + | Увеличить | |
| - | Уменьшить | |
| 0 | Оригинальный размер (масштаб 1:1) | |
| 1 | Подогнать под размеры окна | |
| ALT ENTER | Включить/выключить полноэкранный режим (также активируется при помощи двойного щелчка левой клавишей мыши) | |
| CTRL | Удерживая клавишу CTRL, вы можете выделить область, которую хотите вырезать, без перехода в режим выделения |